
Understanding the Critical First Steps
Carpet installation preparation is the often-overlooked foundation that determines whether your new flooring investment delivers lasting beauty and performance or becomes a source of frustration within months. Professional installers consistently report that inadequate preparation accounts for up to 70% of premature carpet failures, according to the Carpet and Rug Institute’s 2024 installation survey. This comprehensive guide walks you through every essential step to ensure your carpet installation succeeds from day one.
The difference between a carpet that looks professionally installed for years and one that develops wrinkles, seams, or premature wear typically traces back to preparation work completed before the installer ever arrives. Understanding these fundamentals empowers homeowners to either complete preparation independently or intelligently oversee contractors performing the work.
Why Proper Preparation Matters More Than Ever

Modern carpet technology has advanced significantly, with manufacturers engineering products that resist staining, repel moisture, and maintain appearance under heavy traffic. However, these technical innovations cannot compensate for poor substrate conditions or inadequate acclimation. The National Floor Covering Association reports that warranty claims related to installation defects have decreased by 43% since 2020, largely attributed to improved preparation standards and installer education.
Subfloor moisture remains the single most common preparation failure. Concrete slabs can take 30-90 days to cure sufficiently for carpet installation, yet construction schedules frequently compress this timeline. Wood subfloors in humid climates may contain excessive moisture that later transfers to carpet backing, promoting mold growth and adhesive failure. Professional moisture testing using calcium chloride tests or electronic meters should confirm concrete moisture levels below 3 pounds per 1,000 square feet per 24 hours, the industry standard threshold.
Temperature and humidity control during the 48 hours before installation proves equally critical. The International Certified Floorcovering Installers Association recommends maintaining interior temperatures between 65-85°F and relative humidity between 10-65% for proper carpet acclimation. These conditions allow carpet backing to adjust dimensionally to its permanent environment, preventing post-installation buckling or gapping.
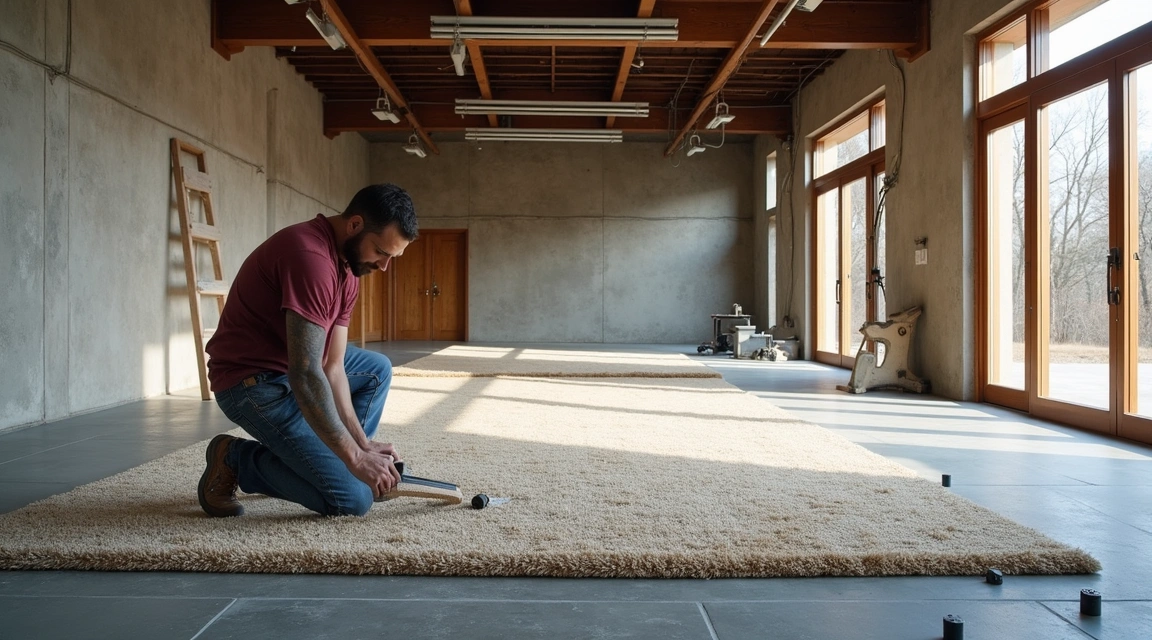
Essential Room Preparation Tasks

Furniture Removal and Room Clearing
Complete furniture removal provides installers unrestricted access to walls, closets, and corners where precise cutting and stretching determine final appearance. While many installation companies offer furniture moving services, homeowners save $150-300 by handling this task personally. Remove all items from closets, as installers typically carpet these spaces. Disconnect electronics and remove wall-mounted items below 6 inches from the floor, as baseboards may require temporary removal.
Small, valuable, or fragile items should be relocated entirely from the installation zone. Carpet installation generates substantial dust and debris, particularly when removing old flooring. China cabinets, collectibles, and electronics benefit from protection in separate rooms.
Old Flooring Removal Considerations
Existing carpet removal reveals subfloor conditions requiring attention before new installation proceeds. Padding deteriorates over time, sometimes adhering to subfloors or leaving residue that interferes with new adhesives. Installers typically include old carpet removal in their scope, but confirming this detail prevents day-of surprises.
Hardwood, tile, or vinyl flooring under carpet presents decision points. Some homeowners preserve these surfaces for future use, requiring careful carpet installation techniques that avoid permanent alteration. Others prioritize optimal carpet performance by allowing installers to add tack strips directly to these harder surfaces.
Asbestos awareness remains crucial for homes built before 1980. Older vinyl floors, mastics, and even some carpet backings may contain asbestos fibers. Professional testing costs $50-150 per sample but provides essential safety information. Disturbing asbestos-containing materials without proper abatement creates serious health hazards and potential legal liability.
Subfloor Inspection and Correction

Professional installers assess subfloors for three critical characteristics: flatness, structural integrity, and cleanliness. The tolerance standard requires subfloors flat within 3/16 inch over any 10-foot span. Greater deviation creates visible irregularities in carpet surface, concentrated wear patterns, and seaming difficulties.
Concrete Subfloor Preparation
Concrete surfaces require grinding or patching to achieve flatness specifications. High spots grind down easily with rented concrete grinders ($75-100 daily rental). Low spots, cracks, and control joints require filling with Portland cement-based patching compounds specifically rated for floor covering installations. Fast-setting compounds allow same-day installation in many cases, though manufacturer specifications should govern timing decisions.
Clean concrete thoroughly to remove dust, oils, sealers, and previous adhesive residues. Contaminated surfaces prevent proper adhesive bonding for glue-down installations and can telegraph through stretched carpet installations. Power washing, chemical strippers, or mechanical abrading may prove necessary depending on contamination type and severity.
Wood Subfloor Requirements
Wood subfloors must be structurally sound, with no deflection exceeding industry standards (typically L/360 under normal loading). Squeaky floors indicate loose subfloor panels or inadequate fastening to joists. Adding screws through subfloor panels into joists every 6 inches along joists eliminates movement and noise. Protruding nails and screws require removal or countersinking below the surface.
Replace water-damaged, rotted, or delaminated panels entirely. Attempting to install carpet over compromised wood subfloors leads to premature failure and potential safety hazards. Oriented strand board (OSB) and plywood panels rated for floor applications provide suitable replacement materials.
Panel joints between subfloor sheets require special attention. Gaps exceeding 1/4 inch should be filled with wood filler compounds. Some installers prefer covering problem wood subfloors entirely with 1/4-inch plywood underlayment, creating a smooth, uniform surface ideal for carpet installation.
Climate Acclimation and Timing Strategy
Carpet rolls stored in climate-controlled warehouses contain specific moisture content balanced to those conditions. Delivery into homes with significantly different temperature or humidity creates dimensional changes as materials equilibrate. The 48-hour acclimation period allows carpet to expand or contract before installation, preventing post-installation buckling or gapping.
During winter months in cold climates, maintain normal heating throughout acclimation and installation. Summer installations in humid regions benefit from air conditioning operation to control moisture levels. New construction presents particular challenges, as building materials continue releasing moisture for months after completion. Moisture meters provide objective data confirming readiness for carpet installation.
Professional vs. DIY Preparation Decision Matrix
Homeowners with basic tools and moderate physical capability can complete most preparation tasks, reserving professional installation for the carpet itself. This approach reduces total project cost by 15-25% according to HomeAdvisor’s 2025 flooring cost survey. However, certain conditions warrant professional preparation services:
- Subfloor moisture issues requiring remediation
- Structural deficiencies in floor framing
- Asbestos-containing materials requiring abatement
- Complex architectural details or custom work
- Large-scale projects exceeding 1,000 square feet
Professional flooring preparation contractors charge $1.50-4.50 per square foot depending on scope, regional labor rates, and material costs. This investment proves worthwhile when preparation complexity exceeds homeowner capability or when time constraints prevent adequate DIY execution.
Critical Preparation Checklist and Timeline
One Week Before Installation:
- Schedule furniture moving or arrange storage
- Purchase transition strips, baseboards, and accessories
- Confirm installer access to all areas
- Arrange pet and child care for installation day
72 Hours Before Installation:
- Remove furniture and clear rooms completely
- Clean subfloors thoroughly
- Complete subfloor repairs
- Deliver carpet for acclimation
48 Hours Before Installation:
- Maintain consistent temperature and humidity
- Verify installer contact and timing
- Prepare payment method
Installation Day:
- Provide installer parking and entry access
- Identify any last-minute concerns
- Review installation plan and address questions
Preparation Impact on Installation Quality
| Preparation Element | Impact Without Proper Attention | Cost to Address Later |
|---|---|---|
| Subfloor Moisture | Mold growth, adhesive failure, warranty void | $2,500-7,500 remediation |
| Surface Flatness | Visible irregularities, premature wear | $800-2,500 correction + reinstallation |
| Room Temperature | Buckling, gapping, seam separation | $600-1,800 re-stretching |
| Old Adhesive Removal | Poor bonding, telegraphing through carpet | $450-1,500 removal |
| Structural Issues | Floor collapse, injury risk | $3,000-15,000+ structural repair |
| Furniture Removal | Incomplete installation, damage risk | $200-500 emergency moving |
Maximizing Your Carpet Investment
Proper preparation transforms carpet installation from a commodity transaction into a value-creating home improvement. The difference between adequate and excellent preparation often costs less than 5% of total project expense while dramatically affecting long-term satisfaction and performance.
Industry data from the Floor Covering Installation Board indicates properly prepared installations last 40-60% longer than those with preparation deficiencies. For a carpet expected to serve 10-15 years under normal conditions, inadequate preparation may reduce useful life to 6-9 years, effectively wasting thousands of dollars in premature replacement costs.
The time invested in preparation—whether personal labor or contractor fees—pays dividends through smoother installation, better appearance, enhanced durability, and full warranty protection. Professional installers consistently report that well-prepared sites allow them to deliver their best work, as they can focus on installation technique rather than compensating for subfloor deficiencies.
As floor preparation technology continues advancing with innovative underlayment systems, moisture barriers, and substrate correction products, the gap between minimally acceptable and truly excellent preparation narrows. Homeowners willing to invest in proper preparation position themselves to benefit from these innovations while avoiding the costly consequences of shortcuts.
—
Preparation Success Summary Table
| Phase | Key Actions | Timeline | Investment |
|---|---|---|---|
| Initial Assessment | Moisture testing, structural evaluation | 1-2 weeks before | $100-300 |
| Subfloor Correction | Grinding, patching, repairs | 3-7 days before | $200-1,200 |
| Room Preparation | Furniture removal, cleaning | 2-3 days before | $0-400 |
| Acclimation | Climate control, carpet delivery | 48 hours before | Utility costs |
| Final Prep | Inspector walkthrough, access preparation | Installation day | $0 |